Cell Selection, Comparison, and Heatmaps
Selecting Cells
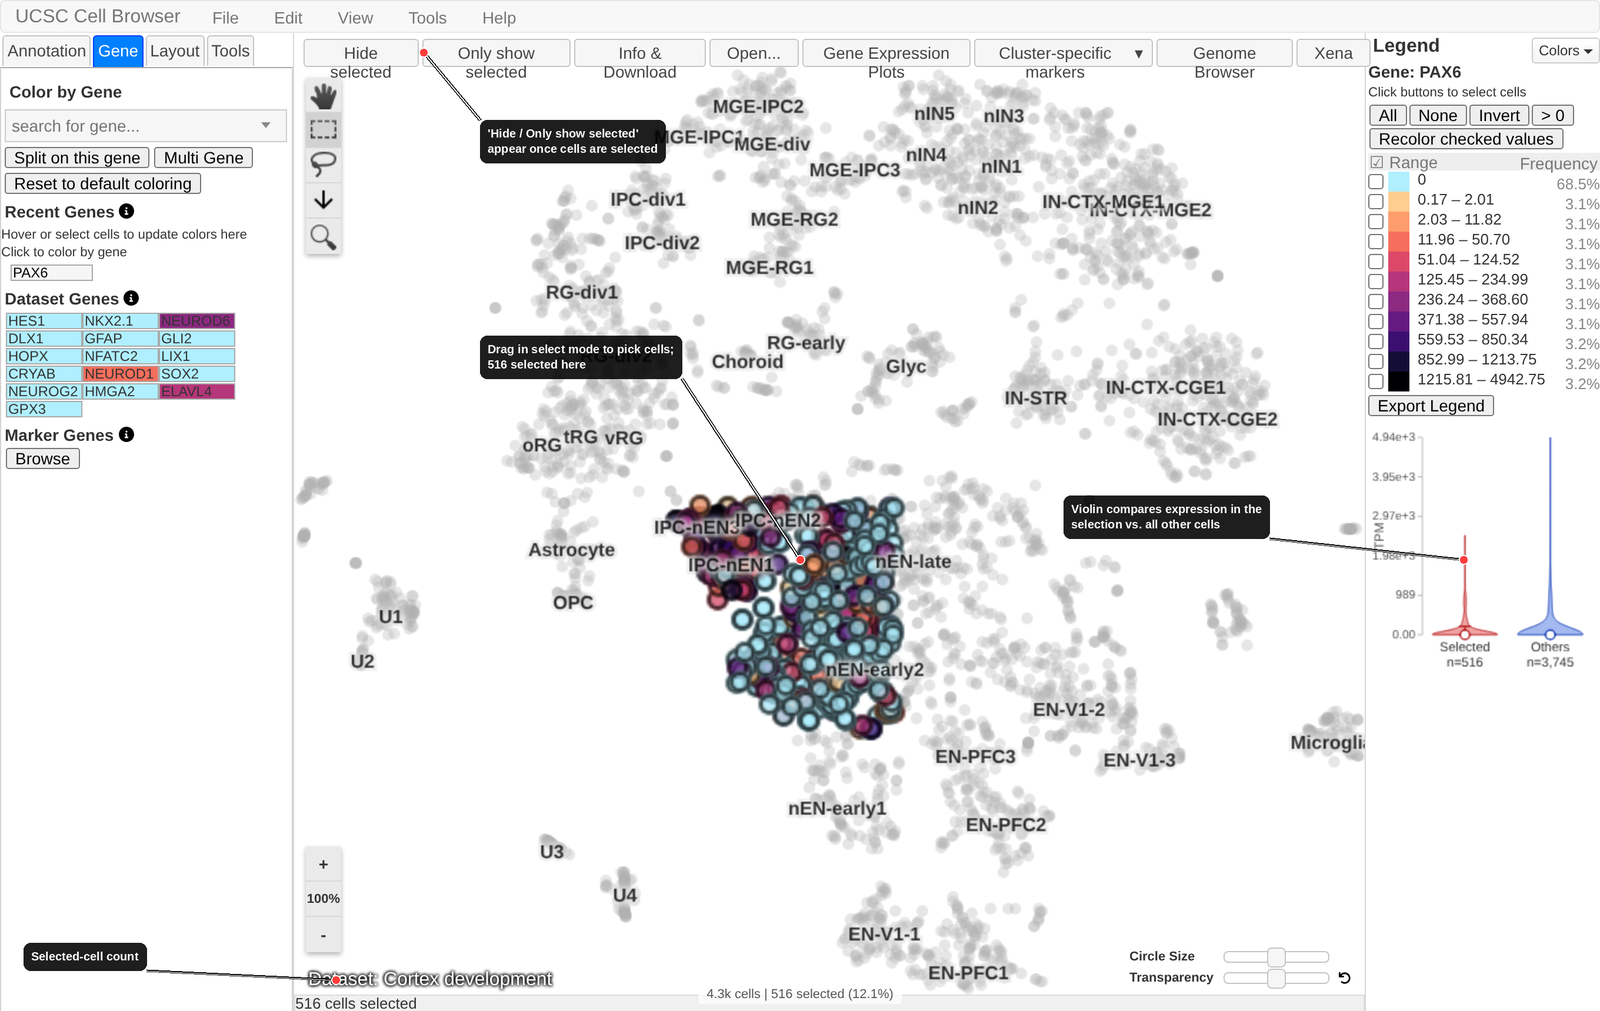
Switch to the select cursor mode (dashed rectangle icon at the top of the cursor toolbar) and click-and-drag to draw a selection box around a group of cells. Once you have a selection, the count is shown in the status bar at the bottom, and Hide selected / Only show selected buttons appear in the top toolbar.
Once cells are selected:
A histogram appears showing the distribution of metadata values within your selection.
If a gene is currently coloring the plot, a violin plot shows gene expression in the selected cells versus all other cells.
You can also select cells by metadata criteria or gene expression using Edit > Find Cells, or by the checkboxes and buttons in the legend (All, None, Invert, > 0).
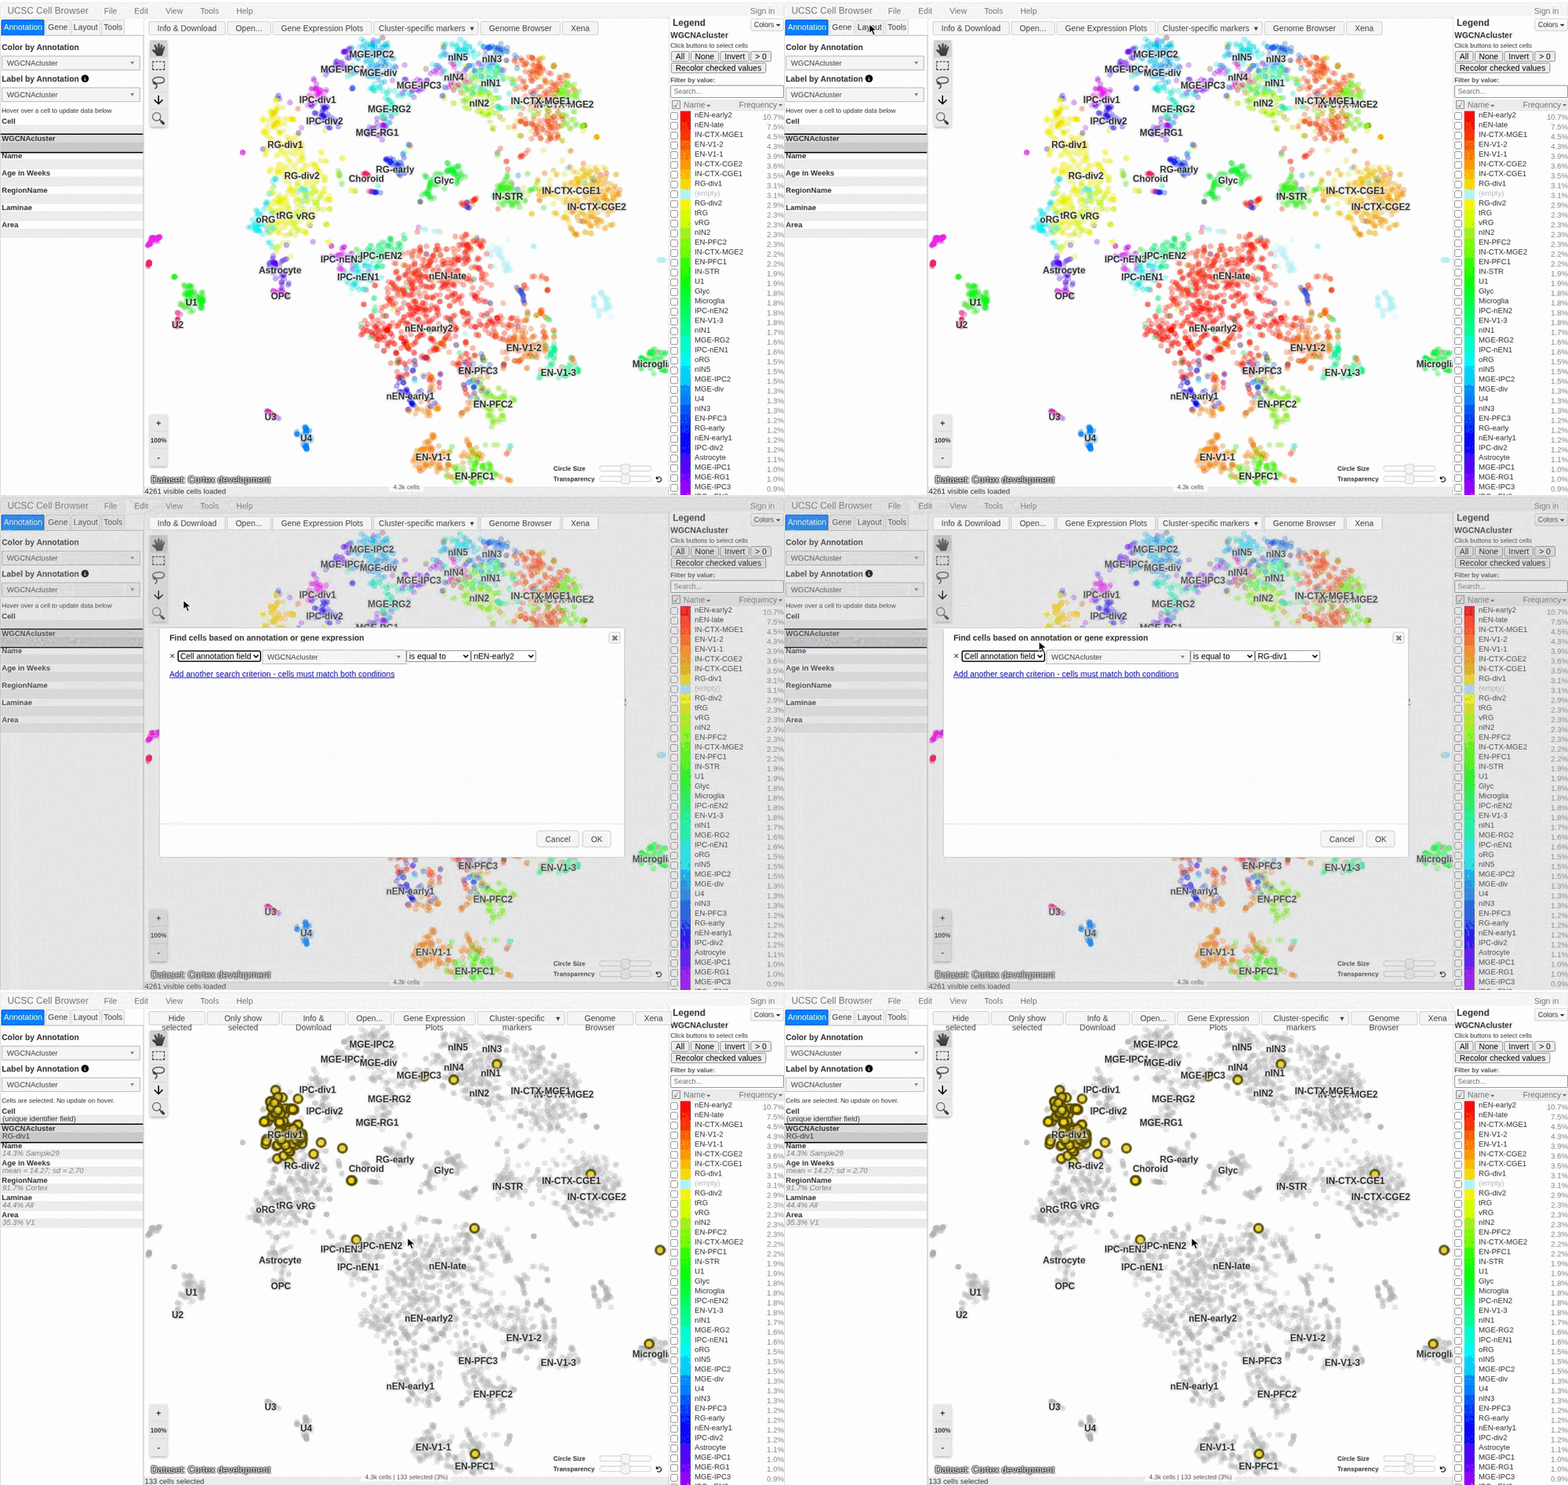
In the animation above, Edit > Find Cells is used to select every cell of a chosen cell type; the matching cells stay highlighted while the rest dim.
Exporting Selected Cells
After selecting cells, go to Edit > Export to download the cell identifiers for use in your own analysis tools (e.g. Seurat or Scanpy).
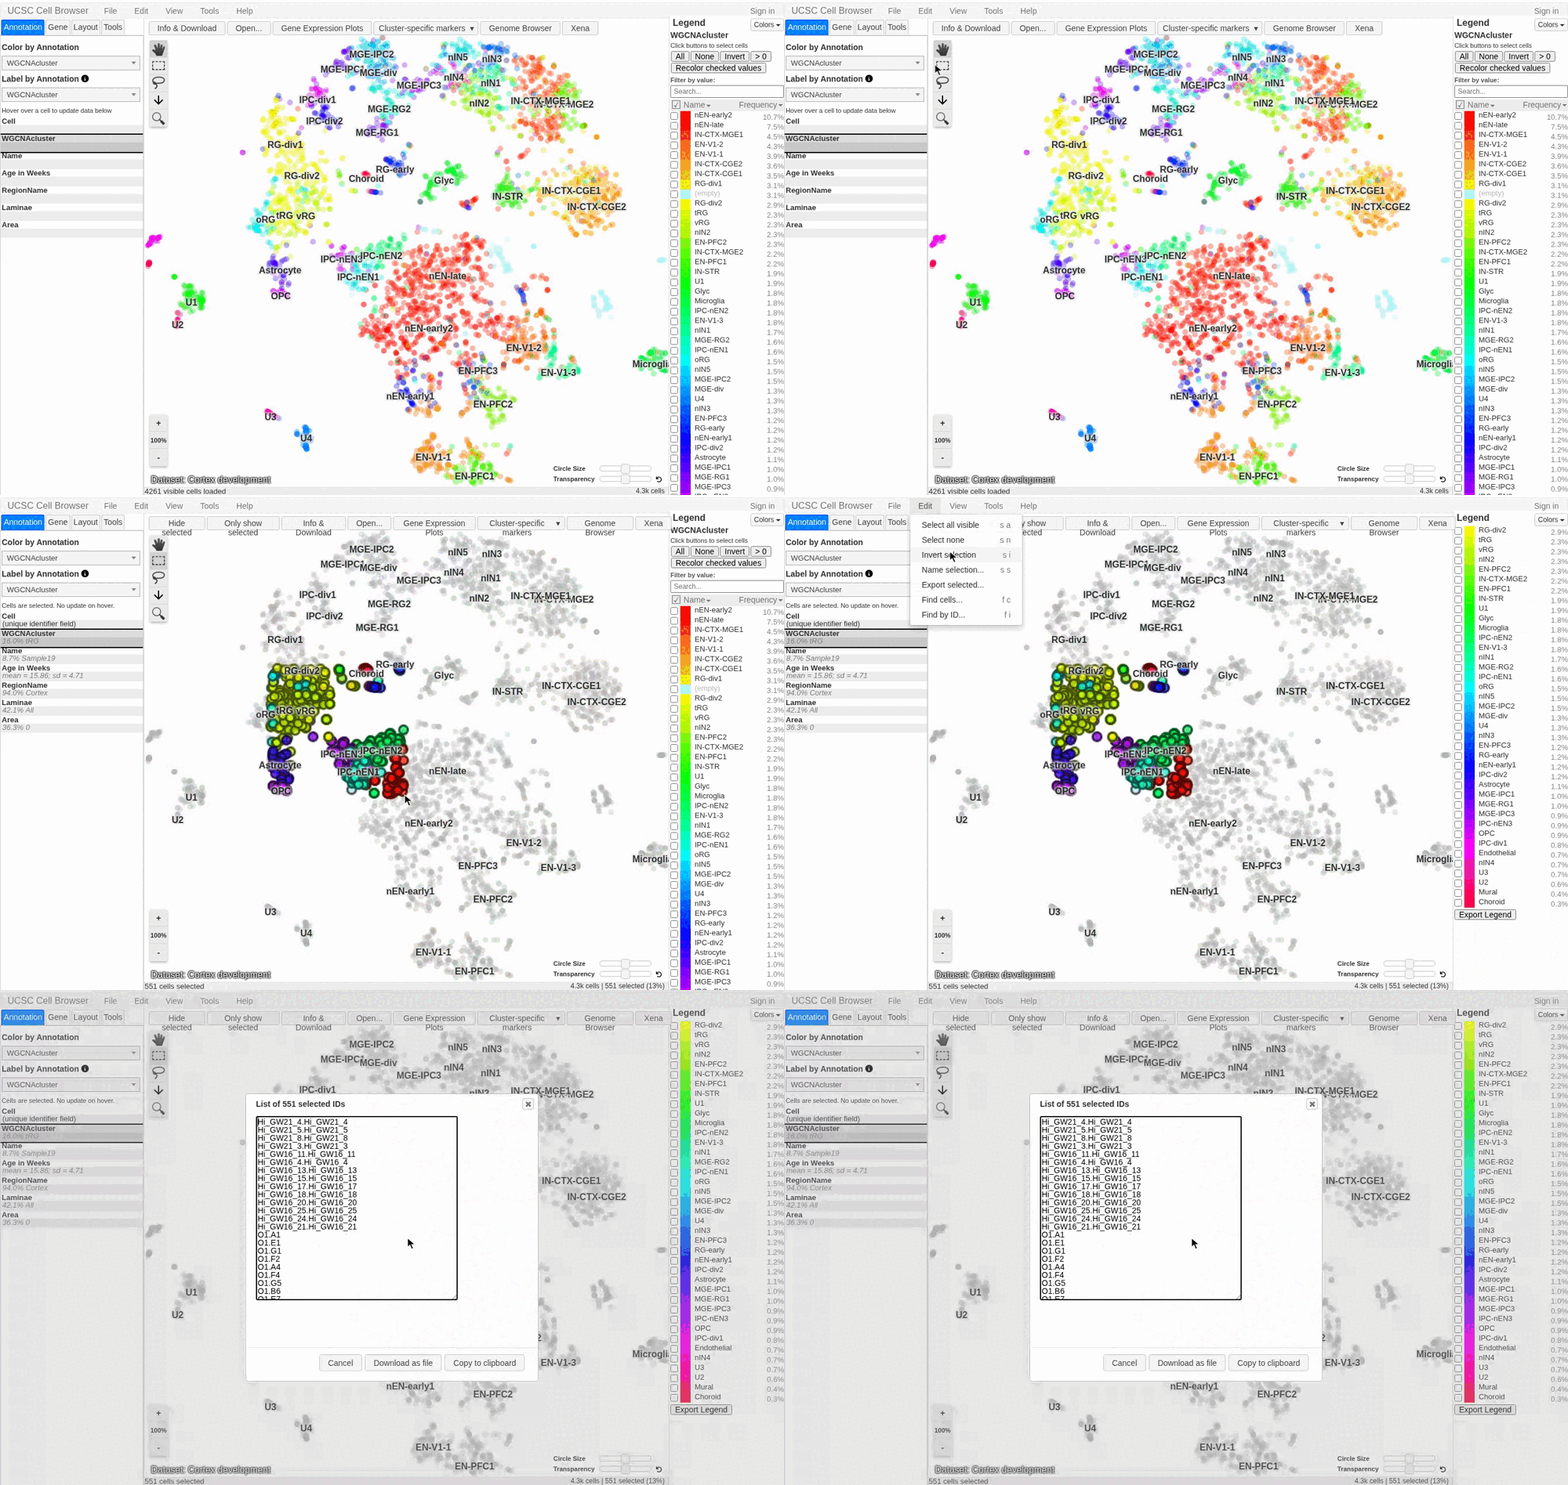
Here a selection box is drawn around a group of cells, and Edit > Export then opens a dialog listing their identifiers, ready to download or copy.
Setting Background Cells
By default, violin plots compare your selected cells against all other cells in the dataset. You can define a custom comparison group:
Select the cells you want as your background.
Go to Tools > Set as background cells (or press
bthens).Select a new group of cells — the violin plot will now compare against your defined background instead of all cells.
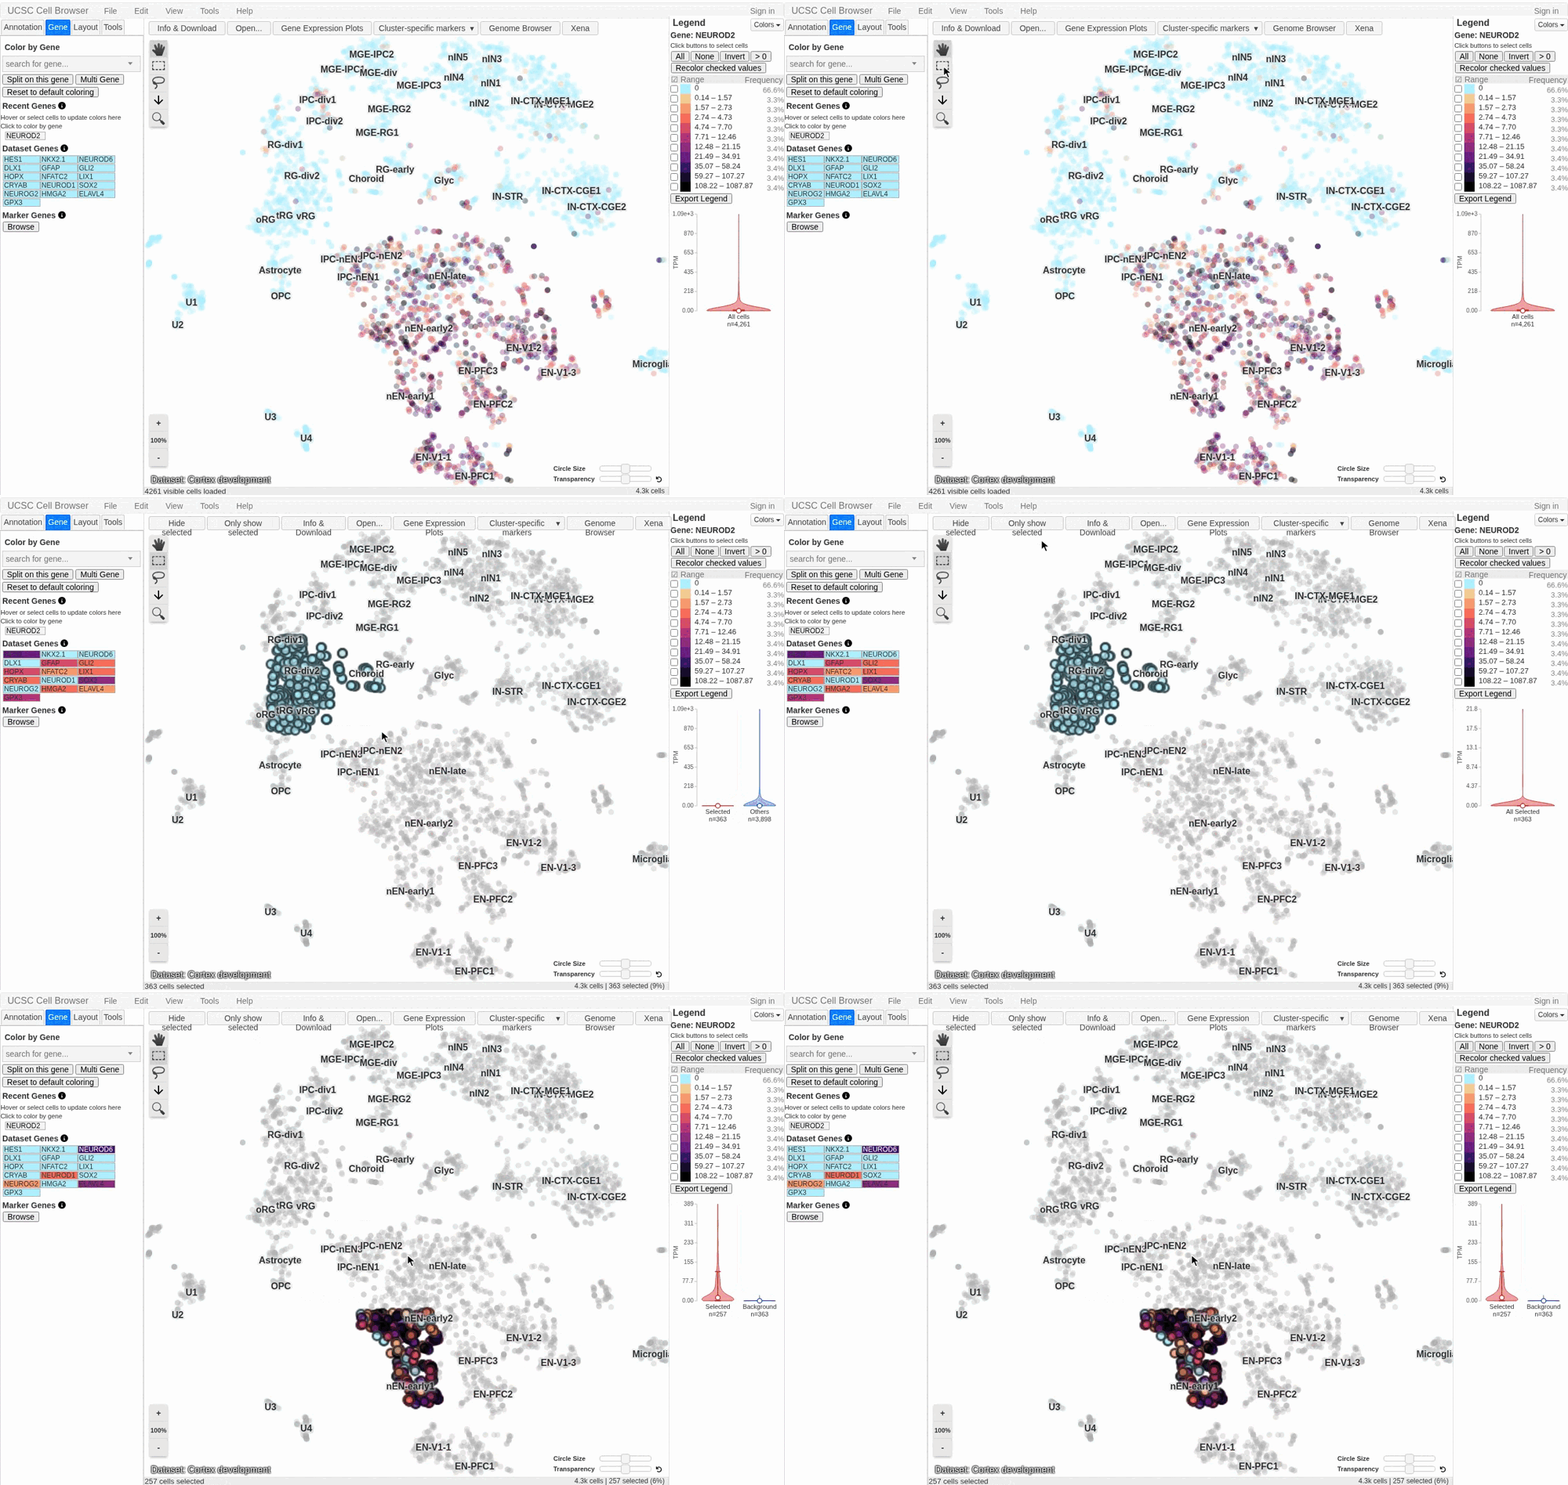
In the animation above the plot is colored by a gene: one group of cells is marked as the background, and when a second group is selected the violin plot shows the two groups side by side (Selected vs Background) rather than the selection versus all cells.
To clear the custom background, go to Tools > Reset background cells
(or press b then r).
Tip
To compare a gene’s expression across many groups at once — rather than one selection at a time — use the Gene Expression Plots window, which draws dot plots and violins split by any metadata field. See Gene Expression Plots.
Split-Screen Comparison
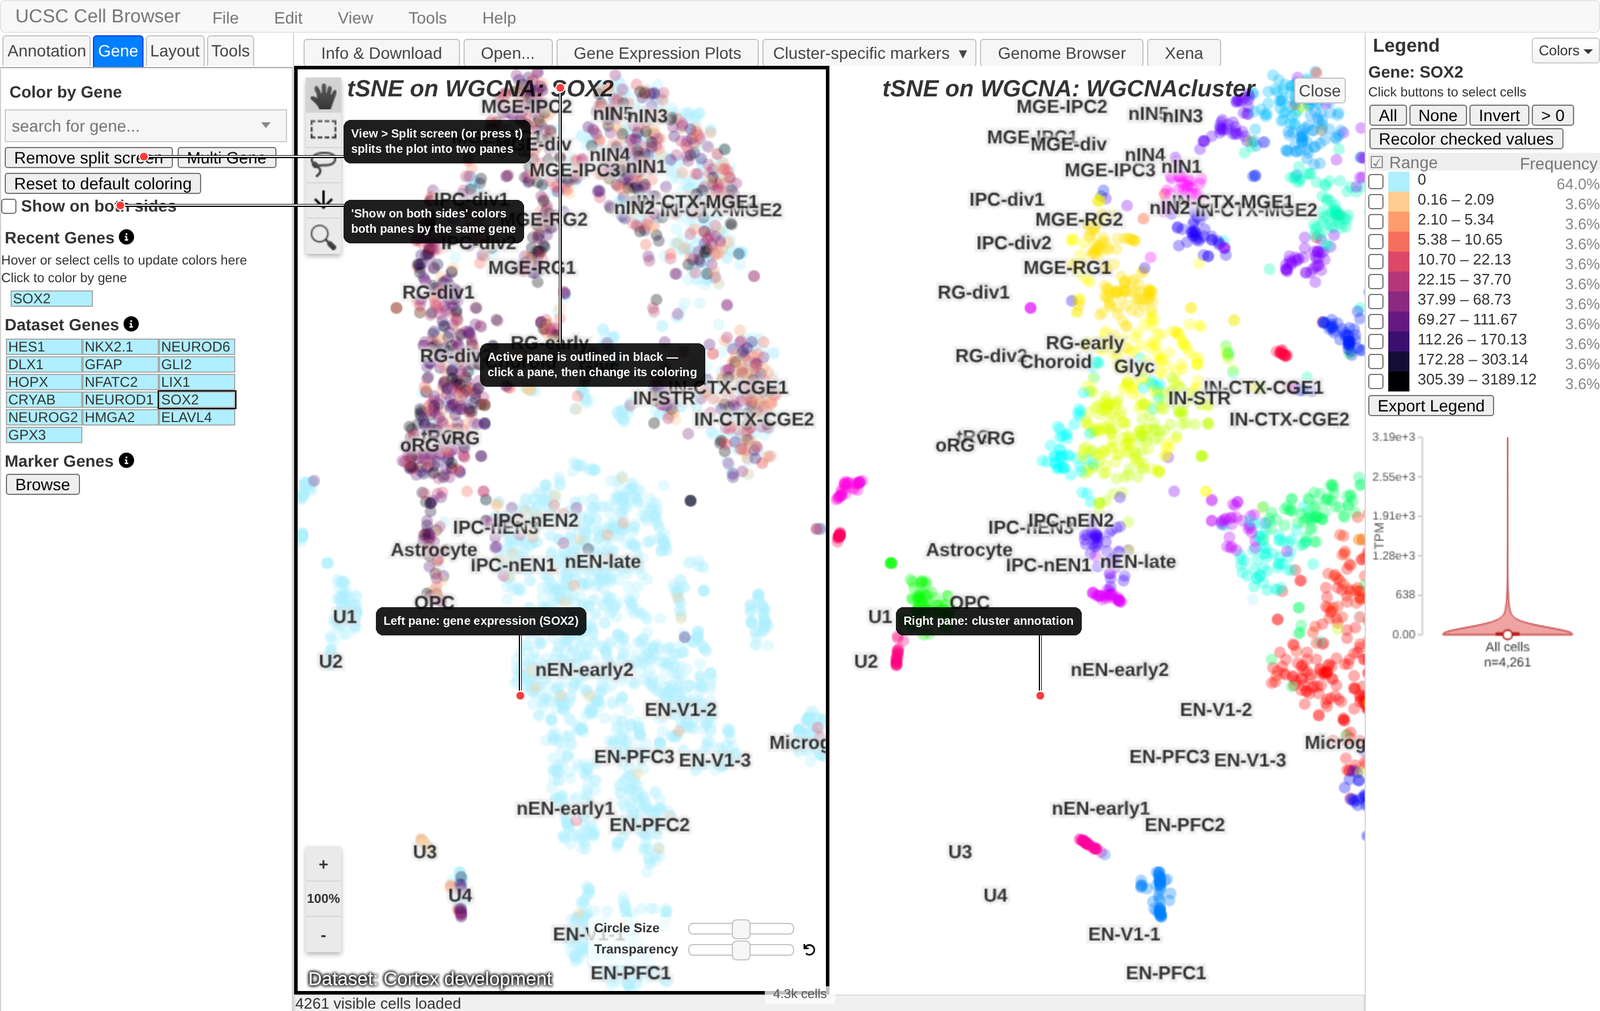
The Cell Browser can split the main view into two side-by-side panes, allowing you to compare two different colorings simultaneously.
To enable split-screen:
Go to View > Split screen, or
Press
ton your keyboard.
The currently active pane is outlined in black and its coloring is reflected in the legend. To change a pane’s coloring:
Click the pane you want to modify (it will get the black outline).
Change the annotation field or gene in the left sidebar.
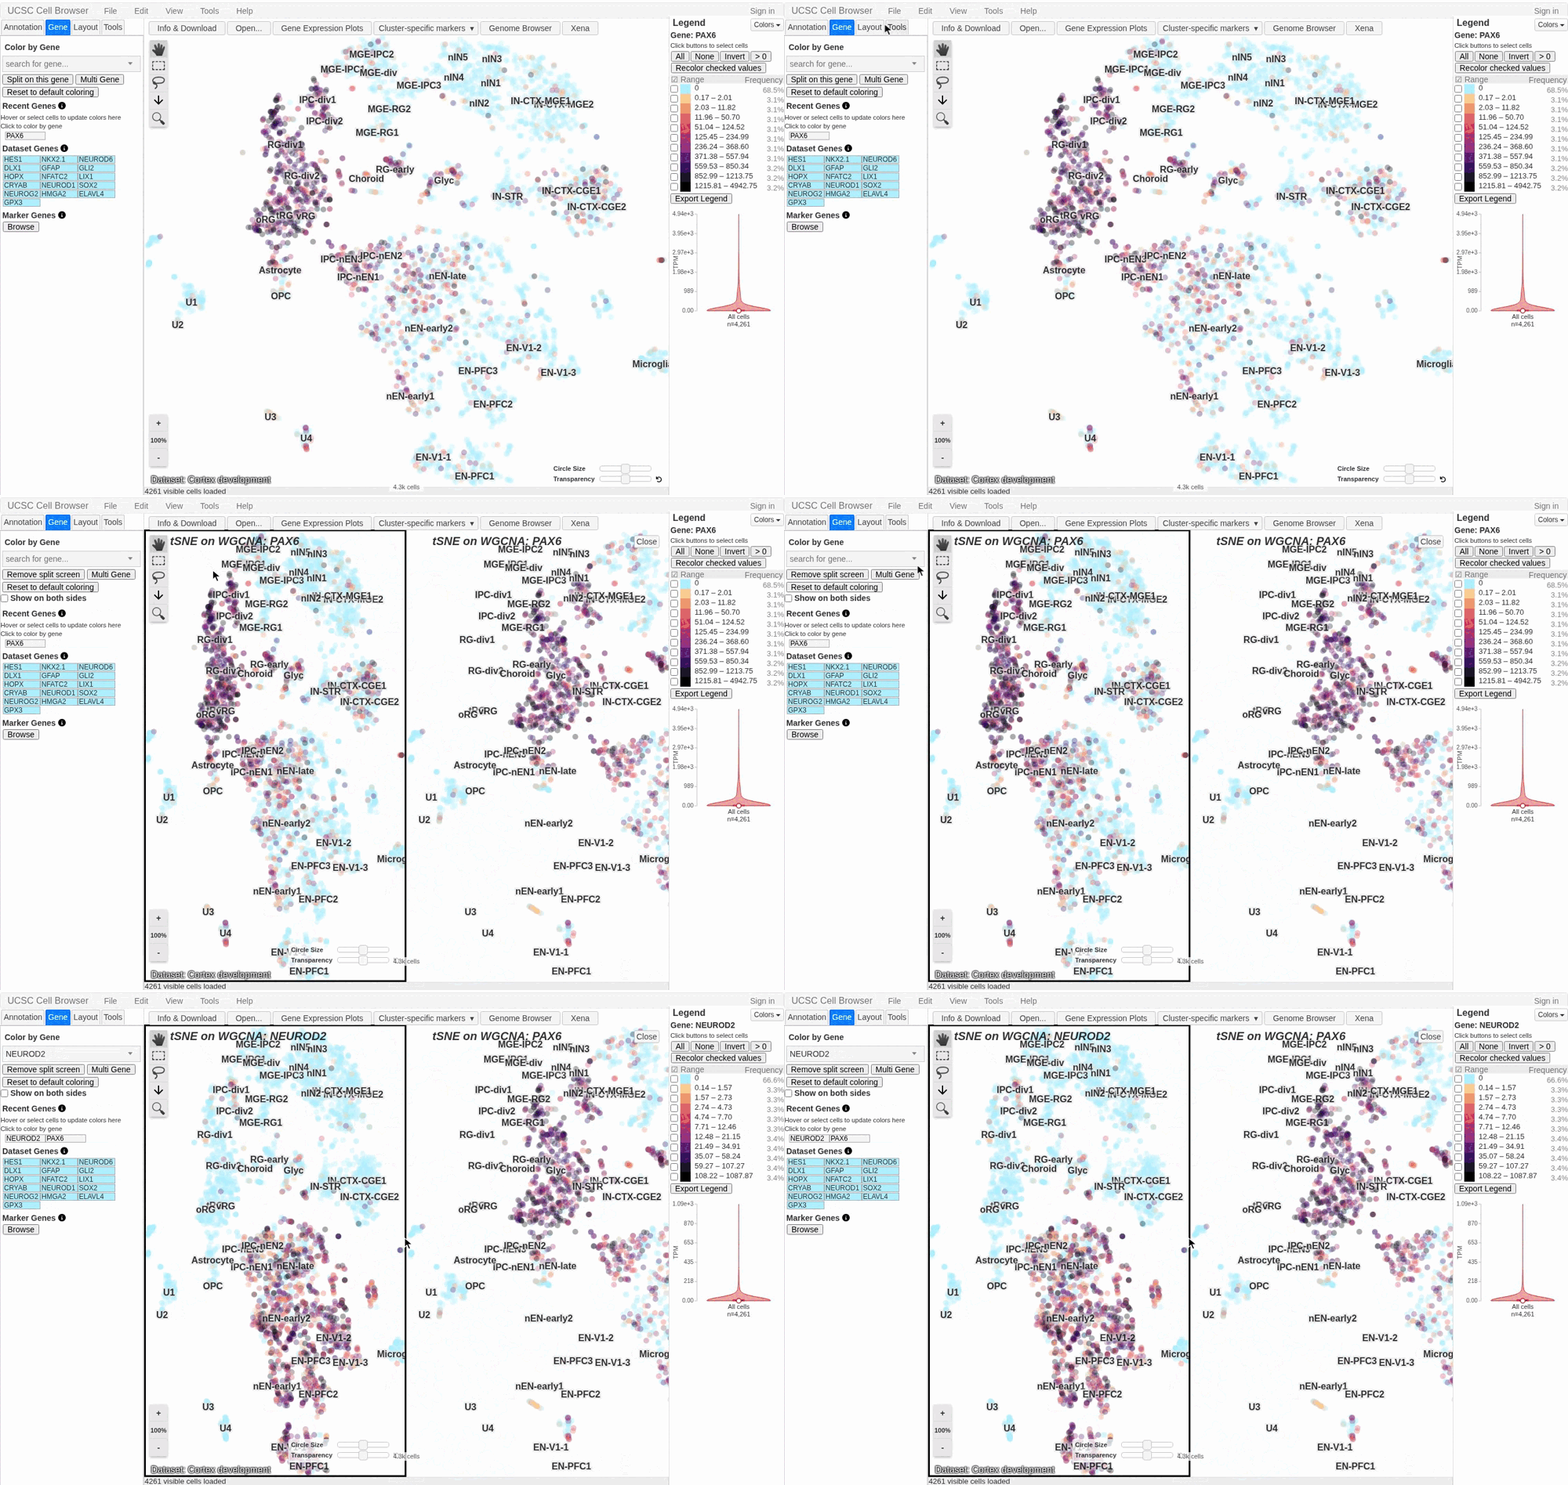
In the animation above, the developing-cortex dataset is first colored by PAX6, a progenitor marker. Splitting the view copies that coloring to both panes; searching for NEUROD2, a neuronal marker, then recolors the active pane, so the two markers can be compared side by side.
Tip
When in split-screen mode, a “Show on both sides” checkbox appears under the Gene tab. Enable it to automatically color both panes with the same gene — particularly useful when comparing a spatial layout with a UMAP layout.
Expression Heatmap
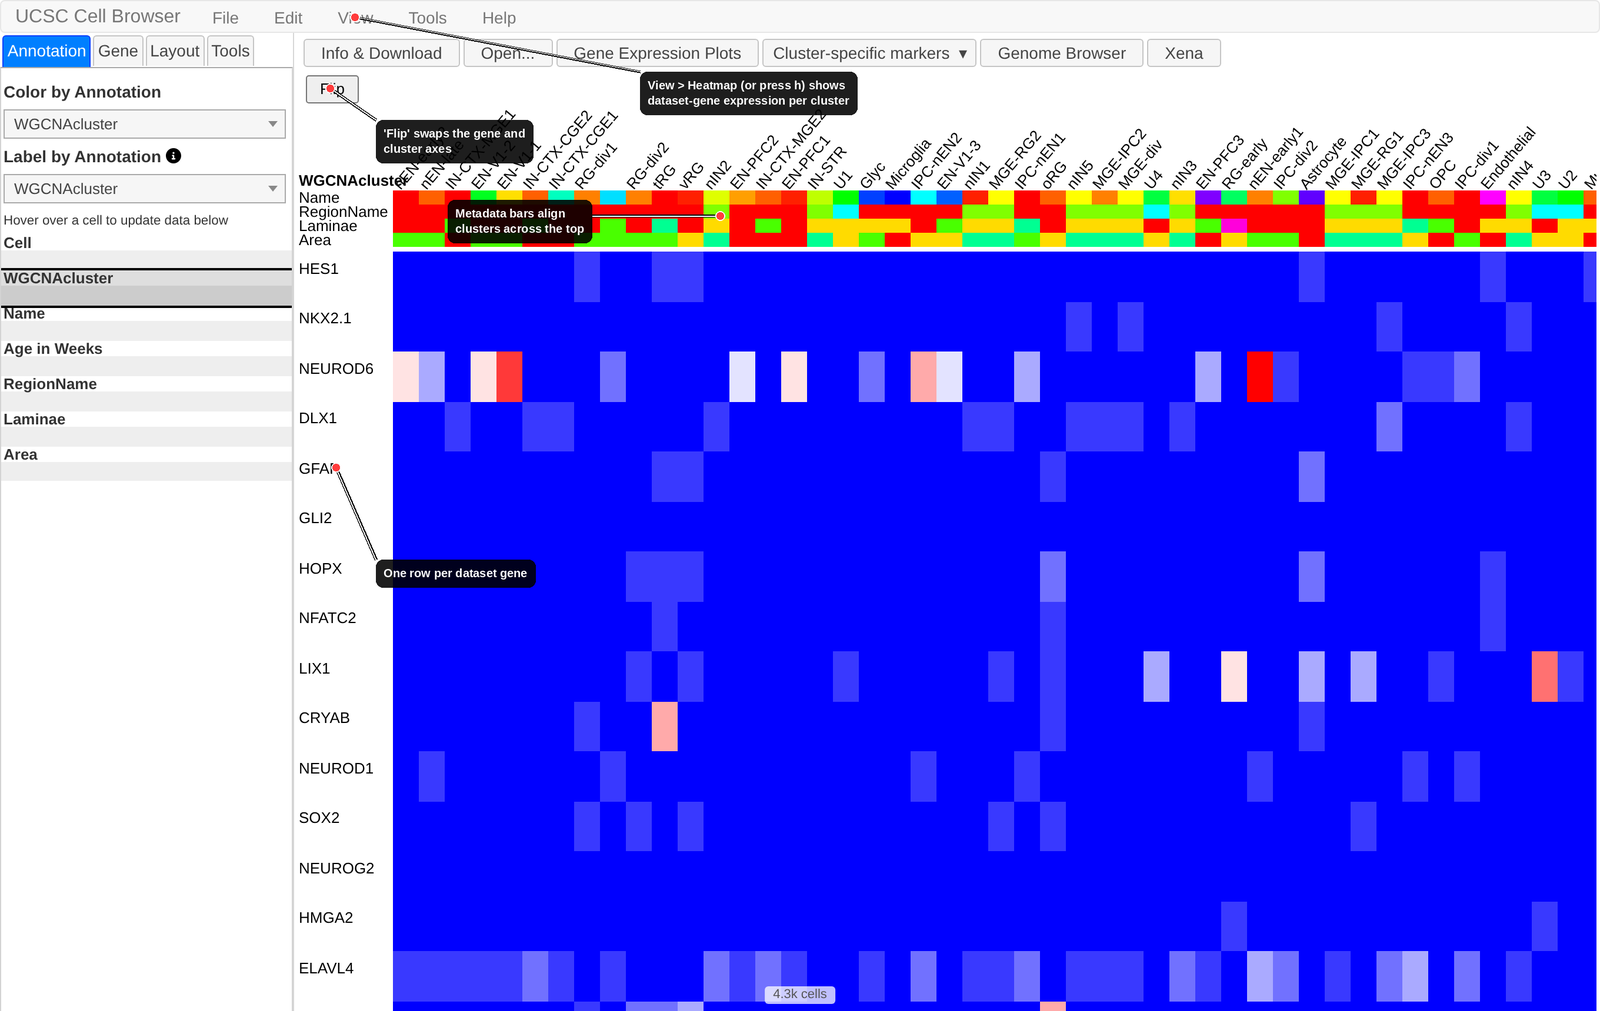
If a dataset includes curated “dataset genes,” you can display an expression heatmap:
Go to View > Heatmap, press
h, or click the Heatmap button in the toolbar to switch the main plot to heatmap mode.The heatmap shows the expression of the dataset genes (one per row) across the clusters (one per column). Colored metadata bars along the top align each cluster with its annotation values.
The Flip button swaps the gene and cluster axes.
Toggle View > Heatmap again (or press
h) to return to the scatter plot.