Custom Annotations and Accounts
The Cell Browser lets you create your own cell annotations on top of any dataset — for example, labelling a group of cells you selected as a new cell type. With a (free) user account, these annotations are saved to your account and can be synced across devices or shared with collaborators through a link.
Creating a Custom Annotation
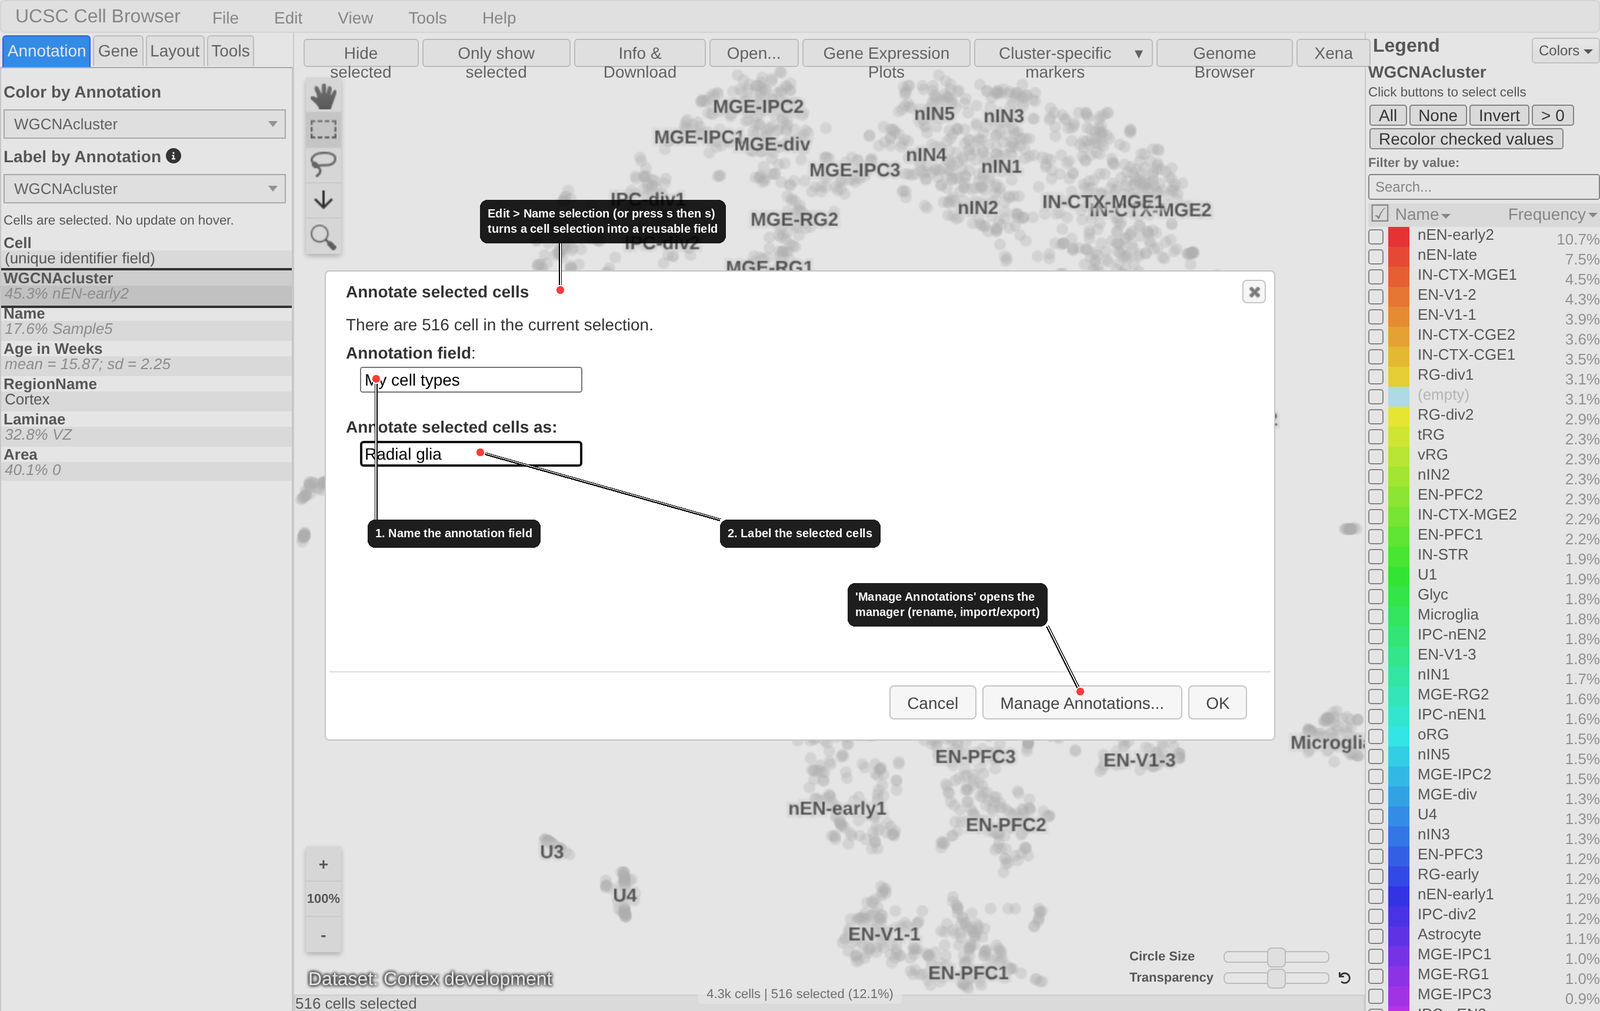
Select a group of cells (see Cell Selection, Comparison, and Heatmaps) — for example, by dragging a box in select cursor mode.
Go to Edit > Name selection (or press
sthens).In the dialog, give the annotation field a name (e.g. “My cell types”) and enter the label to assign to the selected cells (e.g. “Radial glia”).
Click OK.
The plot is immediately recolored by your new field, and the field is added to the Annotation tab alongside the dataset’s built-in metadata. Repeat with a different selection to add more labels to the same field, or use a new field name to start another annotation.
Custom annotations are stored in your browser (in local storage), so they persist across visits on the same computer even without an account.
Managing Custom Annotations
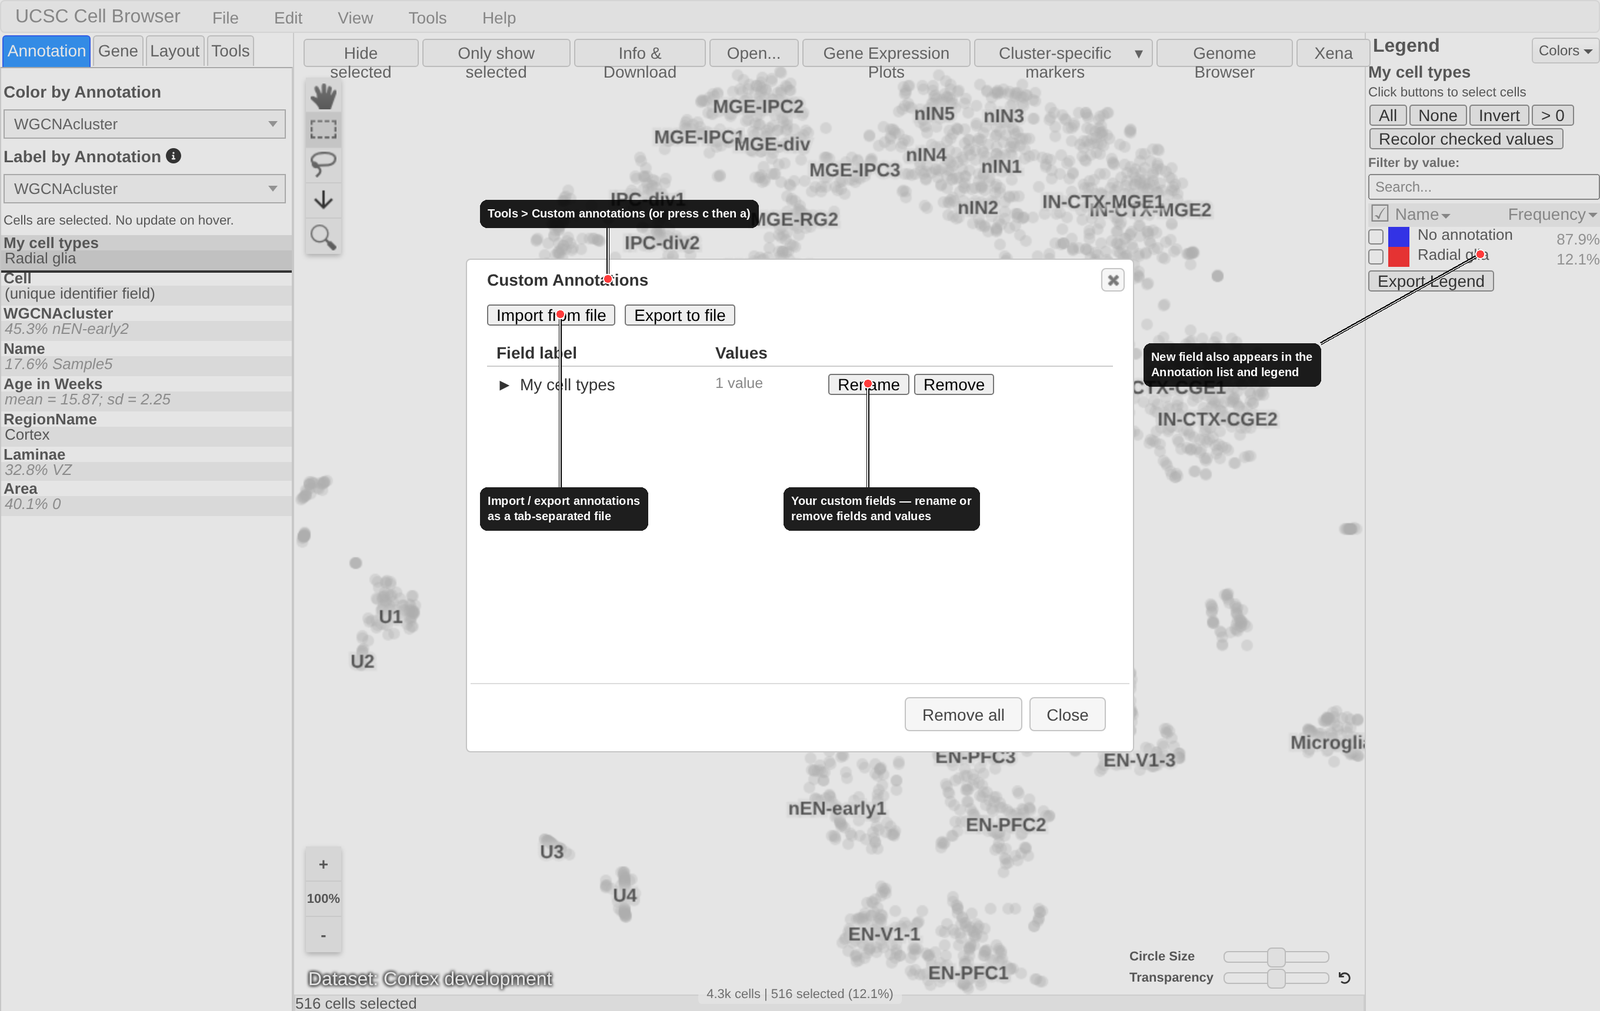
Open the manager with Tools > Custom annotations (or press c then
a, or click Manage Annotations… in the Name-selection dialog). From
here you can:
Rename or remove an annotation field, or rename/remove individual values within it.
Export to file to download your annotations as a tab-separated file, and Import from file to load them back later or on another dataset.
Remove all to clear every custom field.
Signing In
An account lets the Cell Browser remember your custom annotations server-side so they are available on any computer where you sign in, and lets you share them with others.
Click Sign in in the top menu bar.
In the dialog, either sign in with your email and password, or use the Create account tab to register. New accounts confirm ownership through an email-verification link; a Forgot password tab handles resets.
Once signed in, the menu shows your name; use Sign out to end the session.
Note
Accounts are optional. If the Cell Browser instance you are using does not provide an account backend, the Sign in menu will still appear but custom annotations simply stay local to your browser.
Syncing Annotations
While you are signed in, your custom annotations are mirrored to your account automatically:
When you open a dataset, the Cell Browser pulls the copy stored in your account (the server copy takes precedence over the local one).
Every change you make is pushed back up, so your annotations follow you to any device where you sign in.
Annotations you made before signing in are uploaded to your account the first time you open that dataset while logged in, so nothing is lost.